Repository setup#
Do this once per module repository, after creating it from Template-PSModule.
1. Enable GitHub Pages#
Enable GitHub Pages in the repository settings and set it to deploy from GitHub Actions.
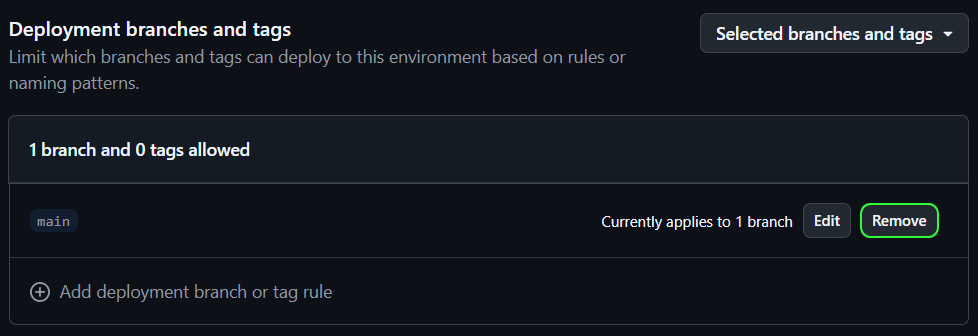
This creates an environment called github-pages that GitHub deploys the documentation site to.
Within the github-pages environment, remove the branch protection for main.
2. Create PSGALLERY_API_KEY#
- Create an API key on the PowerShell Gallery. Give it permission to manage the module you are working on.
- Create a repository or organization secret called
PSGALLERY_API_KEYand set the API key as its value.
If you plan to create many modules, use a glob pattern for the API key permissions in the PowerShell Gallery and store
PSGALLERY_API_KEY on the organization instead of on each repository.
3. Add the caller workflow#
Create .github/workflows/Process-PSModule.yml in the module repository:
name: Process-PSModule

on:
  workflow_dispatch:
  schedule:
    - cron: '0 0 * * *'
  push:
    branches:
      - main
  pull_request:
    branches:
      - main
    types:
      - closed
      - opened
      - reopened
      - synchronize
      - labeled
      - unlabeled

concurrency:
  group: ${{ github.workflow }}-${{ github.event.pull_request.number || github.ref }}
  cancel-in-progress: false

permissions:
  contents: read
  pages: write
  id-token: write

jobs:
  Process-PSModule:
    uses: PSModule/Process-PSModule/.github/workflows/workflow.yml@v8
    secrets:
      PSGALLERY_API_KEY: ${{ secrets.PSGALLERY_API_KEY }}
      GitHubAppClientId: ${{ secrets.SHELLY_CLIENT_ID }}
      GitHubAppPrivateKey: ${{ secrets.SHELLY_PRIVATE_KEY }}
Every permission in that block is required. GitHub App installation tokens perform repository writes. A push to main publishes a stable release after the full pipeline passes;
the pull-request trigger handles CI, prereleases, and prerelease cleanup. See
Workflow inputs for what each permission is used for, and
Calling the workflow for passing test secrets and variables.
4. Add the settings file#
Create .github/PSModule.yml. An empty file is valid — every setting has a default:
Name: null
See Settings for the full contract and Configuring the pipeline for worked examples.
5. Configure the documentation site#
Process-PSModule builds documentation with Zensical from .github/zensical.toml. The template
ships a working file; update the site name and repository links to match the module.
Next#
Open a pull request and let the pipeline run — see Your first release.